
The Airplane is Here
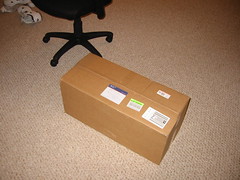
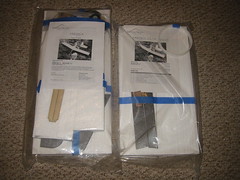
I found a large, mysterious box at my front door and there was an airplane in it ;-). It’s a Mountain Models Magpie, with both the slow flyer (SF) and sport wings. I unpacked everything and took some pictures.
I have actually been gearing up for this for a couple of weeks. I already have the radio (a Spektrum DX6), the motor and speed controller. The only bits still on the way are the battery and charger and they should be here by the weekend. Hopefully I’ll have the airplane built by the weekend.
The Magpie is a park flyer/trainer with a 46″ wing span (40″ for the sport wing) made from EPS and Depron. EPS is Styrofoam, like the cheap coolers you get at 7-11. Depron is a more finely textured foam, like that used in sign board or meat packing trays.
The manual (see a pdf copy here) recommends 5 Minute epoxy for bonding the foam parts together. I wasn’t too keen on using epoxy. I have used it in the past and it can be tricky. You have to mix it exactly 50/50 and with a 5 minute set time you have to work fast. It makes a very strong bond. Its also relatively heavy and weight doesn’t fly.
I looked for some alternatives and came up with Polyurethane glue in the form of Elmers Pro Bond / Ultimate. This stuff activates with water and can be cleaned up with soap and water before it sets (neat hu?). It foams and forms bubbles as it cures and tends to push the pieces you are gluing apart, not a good thing. As I had never used this kind of glue before I did 3 test pieces to see how it works. I did the first with too much glue and held it together with rubber bands. The second I used less glue and just pressed the foam blocks together. The third I used blue painters tape to hold the blocks and used even less glue.
The best results were with minimal glue and tape. The rubber bands bit into the EPS and twisted the blocks. The press fit blocks were pushed apart by the expanding foam. So use tape and use as little glue as possible. This stuff seems to set up stiff in about an hour and you probably have 15 mins of working time to set and tape the parts. The directions say to wait 24 hours for it to fully cure.
Enough about glue, on to construction.
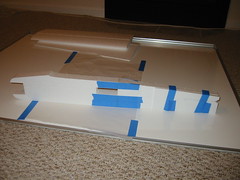
The manual recommends cluing the wing halves together first. Doing the fuselage looked easier so I did that first. I used the painters tape to stick the cuttings from the taper on the rear fuselage back together. This make a sandwich and make everything uniform so when the two halves of the fuselage were glued and taped together they were as straight as possible.
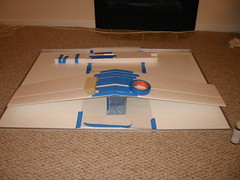
I didn’t have a 44″ flat surface in my apartment to set up the wings on so I put my white board on the floor and covered the middle of it with Parchment Paper. Parchment paper is superior to wax paper in every way. Mosses himself couldn’t get from one side to the other. CA glue will actually bead up on it and refuse to set.
I did the slow fly wing first. Its a bit tricky to get the halves to meet up perfectly. I joined the bottom of the wing with lots of painters tape and then applied the glue to the joint. Then I flipped the wing upside down and placed it on a large tissue box so that the wing tips weren’t touching the ground. In that orientation gravity applies gently pressure to the bond to keep the parts together. The roll of tape and sanding block ad a little weight to the equation.
I’m going to let the parts cure overnight. Tomorrow, strapping tape…