Bet you thought I was gonna write about snow. It was cold, I’m over it.
I have been putting some serious time into Sketchup for a new project. Since nobody on RC Groups reads this blog I think I can get away with posting pics of it here as examples before I mention it over there. Ok, on with the tips:
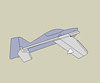
Make components of everything symmetrical. I do half the wing, half the elevator, half of the sides etc. Don’t duplicate anything, just make a component and copy it. Here you can see a shot of the new project and what you see is exactly 1 of each component in the drawing. This is the best way to cut down on your workload.
If something would be more convenient as a whole object, say a whole wing or the elevator use make a group out of them. This way they can be selected and manipulated as if they were one component without the duplicated geometry penalty. The Outliner is your friend here. You can rename groups and rearrange the group hierarchy in the outliner.
Sketchup makes it really easy to extrude things into 3D. Resist the temptation to make all your parts 3D. In the long run its just so much easier to manipulate things in a 2D plane than in 3D. It will save you a lot of work. You can place everything in 3D of course but you have to remember to keep things the right distance apart (3mm or 6mm depending on the depron or foam thickness your shooting for). You run into so many problems making geometry changes in 3D that its just safer to keep everything in 2D. If you have something complicated that would be easier to work out if everything were in 3d try making a copy of all the components and use the “Make Unique” option so your changes wont affect anything else. Usually you can work it out in 3D and then copy the changes back to the 2D parts.

If stuff suddenly stops forming nice surfaces its because all the points are not in a plane. Finding the offending point or points can be hard. A quick trick to see which points are off the plane is to use the scale tool on the component. If the scale tool even lets you stretch the component vertically its not a flat surface. Stretch it vertically and the high points will be exaggerated and you can find them easily. Here is an example where one of the circles is 0.1mm higher than the rest. Hard to see but with the scale tool its easy.

Don’t embed cut out marks in your components treat them like an overlay instead. It took me a while to grok why this is important. At first I was applying lightening holes and assembly cutouts right to the component geometry. This had lots of undesirable effects, It broke up the geometry and making changes was very involved. Now I apply cutouts as an overlay using a separate component. Then I group the cutouts and the main component together. Now I can play with changing the construction cutouts without affecting the component geometry. Also things like lightening holes that are supposed to be very similar can be a single replicated component. You can even lay them down with the move/copy tool. Another bonus us that scaling now works correctly. If you have a 3mm cutout in your component is probably a hard value that you don’t want to scale if you scale the component. Just extract all of that stuff out into a separate component and it wont scale. This is great for shrinking or stretching plans.
I gave up on doing tiled plans. Sketchup doesn’t support it natively and there is no good solution that I have seen yet. You can print plans at Kinkos on the large format printer and save yourself the trouble. The large format black and white printer will print up to 36″ or 90cm wide by however long you need, It’s a drum fed laser. An F3P model will cost you between $8 and $10 depending on how well you use the space. If Sketchup suddenly supports this i may reconsider but having the plans printed is very convenient.
Lastly get Bezier.rb before you get too involved in doing any curves. When its correctly activated you’ll find it in the menu; Draw ->Bezier Curves. This is the secret to nice bubble canopies and the other tricky curvy bits. Its a must have. I just wish it was in there from the beginning and it had an icon in the toolbox. Just assign it a hot key (I made mine ‘C’ since its rare that I draw a circle).
My biggest Sketchup time saver? The Spacebar is the default shortcut to get back to selection mode from whatever tool you using.
Look for plans of the new airplane as soon as I get one built and tested. At the rate I’m getting things built and flown it might not be till late January.